How to Film First-Person YouTube Videos with Smart Glasses
The best POV YouTube channels aren’t winning on camera specs. They’re winning on angle. A chest mount drifts. A helmet cam screams “I’m filming.” Smart glasses give you the exact view from your eyes — and nobody around you knows you’re recording. That’s a hard advantage to replicate with a rig.
Why POV YouTube Is Growing Right Now
Walk-a-day-in-my-life content, trade skill breakdowns, travel vlogs, cooking tutorials — first-person video works across almost every niche because it feels like lived experience, not a presentation. Viewers stay longer. Comments get more personal. The format rewards authenticity over production.
The bottleneck has always been gear. Action cams on head mounts look awkward, require stabilization in post, and make you the weird person at the farmers market with a camera bolted to your skull. Smart glasses sidestep all of that.
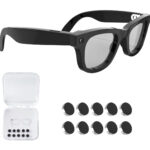
What Aventa’s Camera Actually Does
The Aventa G100 shoots 1080p video and 12MP photos. For YouTube, 1080p is exactly where you need to be — it’s still the dominant resolution on the platform, files stay manageable, and YouTube’s compression algorithm treats it well.
The camera sits at eye level by design, so your footage matches what you’re actually looking at. No angle guesswork. No adjusting a mount before every take. Put the glasses on and the angle is right.
Audio comes through the built-in microphone. It captures your voice clearly for narration and handles most outdoor environments without issue. In a genuinely loud setting — a concert, a busy kitchen during a dinner rush — you’ll want to narrate in post rather than rely on the onboard mic. That’s an honest limitation worth knowing.
The Full Filming Workflow
Before you go: Charge the glasses fully. Active recording pulls about 3 hours on a single charge. The charging case extends that to a full day for multi-session shoots, so keep it in your bag if you’re filming over several hours.
While filming: Pair the glasses to your phone via Bluetooth 5.0 before you start. Use the built-in voice assistant to start and stop recording hands-free — this is the detail that makes or breaks POV content. Reaching up to press a button appears in the footage and immediately breaks the illusion. Voice control keeps your hands down and the shot clean.
After filming: Transfer your files to your phone or computer. The footage exports as standard MP4 — no proprietary software, no app subscription. Drop it into whatever editor you already use and you’re good to go.
Editing for the POV Format
First-person video has a few quirks worth knowing before you sit down to cut.
- Stabilization first: At 48g, natural head movement still creates subtle wobble over long clips. Apply digital stabilization in your editor before anything else — Premiere Pro, DaVinci Resolve, and CapCut all have it built in. Do this step first; it affects every other adjustment.
- Exposure transitions: The glasses auto-expose, which means walking from a dim room to bright sunlight produces a second or two of overexposed footage. Cut those transitions or drop a quick fade over them. It’s not a flaw — every auto-exposure camera does this — just plan for it.
- Audio mixing: Narrate close to the mic and run a noise reduction pass in post. The onboard audio is solid for voice; it just needs light cleanup in busier environments. Free tools like Audacity handle this fine.
- Jump cuts are expected: POV audiences don’t need every second filled. Tight cuts keep pace. A three-hour walk-and-talk edited down to eight minutes with jump cuts will outperform an unedited twenty-minute version almost every time.
One honest note on image quality: the 1080p footage won’t have the color depth or dynamic range of a dedicated mirrorless camera. Grade it simply — a small contrast boost and slight warmth tend to look good. Don’t chase a cinematic grade the sensor can’t support.
Upload Settings for POV Content
YouTube’s algorithm doesn’t care that your footage came from glasses — retention and click-through rate drive everything. A few things that specifically help POV channels:
- Title specificity: “POV: Plumbing a Full Bathroom Alone” outperforms “Day in My Life Vlog #12” by a wide margin. Include the activity, not just the format.
- Thumbnail strategy: Pull a strong frame from the footage or use a reaction shot from a separate camera. The eye-level angle produces naturally compelling thumbnails — wide, immersive, and different from standard talking-head shots.
- Chapters: Add timestamp chapters for anything over five minutes. POV viewers skip around; make it easy for them.
- Export settings: 1080p at 30fps standard, or 60fps if you’re filming anything with motion. YouTube compresses native-resolution uploads less aggressively than upscaled or downscaled files.
- Tags: Include “POV,” “first person,” your niche activity, and a location if relevant. Local discoverability adds up fast for trade and lifestyle channels.
Aventa vs. a Full Camera Rig
Here’s the direct comparison, because it’s a real question.
| Aventa G100 | GoPro Hero + Head Mount | Ray-Ban Meta | |
|---|---|---|---|
| Price | $109 | $400+ | $299 (soon $300+) |
| Video resolution | 1080p | Up to 5.3K | 1080p |
| Looks normal to wear | Yes | No | Yes |
| Hands-free recording | Yes (voice) | Partial (app required) | Yes |
| Battery (active use) | ~3 hours + case | ~2.5 hours | ~4 hours |
| Weight | 48g | 154g+ (with mount) | 49g |
| Prescription lens option | Yes (custom, +7 business days) | No | Yes (third-party) |
| Subscription required | No | No | Meta+ for some features |
| AI assistant | Yes (ChatGPT-compatible) | No | Yes (Meta AI) |
A GoPro setup gives you significantly better image quality and built-in stabilization. If you’re building a channel where footage fidelity is the product — cinematography, professional instructional content — it’s worth the $400+. But if you’re testing a POV format or need something you’ll actually wear all day, that’s a different calculation.
Ray-Ban Meta is a genuinely good product. Aventa is 1g lighter (48g vs 49g), doesn’t require a Meta subscription for core features, and leaves $190 in your pocket. For a first-person YouTube workflow, the feature sets are comparable at very different price points.
Who Should Buy Aventa for YouTube
- Creators testing POV formats before committing to a full production rig — the 30-day money-back guarantee means low risk
- Trade and skill channels (mechanics, chefs, personal trainers, electricians) who need both hands free while filming
- Travel vloggers who don’t want to look like they’re filming every interaction
- Prescription wearers who can order custom Rx lenses — lead time is +7 business days on custom orders
- Creators on a budget who want the POV angle without a $300+ starting point
If you need 4K, waterproofing, or slow-motion, Aventa isn’t your tool. It’s not trying to replace a GoPro. It’s trying to be the glasses you’d wear anyway — except they also capture everything you see.
The Honest Verdict
POV YouTube doesn’t require the best camera. It requires the camera that gets used. Smart glasses get used because they’re just glasses — no setup ritual, no asking someone to hold a camera, no explaining to a stranger at a job site why you have a lens mounted to your forehead.
At $109 with free US shipping and a 30-day money-back guarantee, the Aventa G100 is the lowest-friction way to start filming first-person content. If the format doesn’t click for your channel, return it. If it does, you’ve validated a workflow before deciding whether to invest in better gear.
You can order the Aventa G100 at aventaglasses.com — ships from a US warehouse in 2–5 business days, no subscription, no extra app fees.
Last updated: May 2026